
A damaged ball joint will swivel vertically and horizontally. This will affect your handling negatively at low-pace and is dangerous at high speeds. You will also hear a knocking sound as you make a turn. You need to replace the ball joint right away to keep your vehicle road-safe. You can do it on your own by following this how to remove a ball joint without a press guide.
What is a Ball Joint?
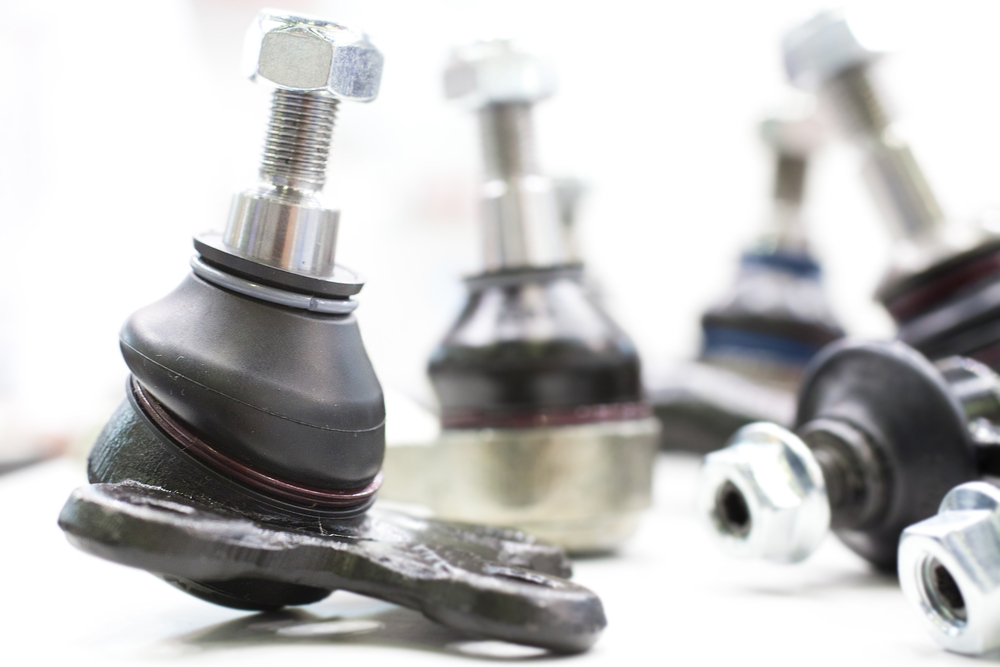
Ball joints are sphere-shaped bearings connected to the control arms of the steering knuckle. It has a socket and steel bearing stud enclosed in a case. The bearing stud is shaped and threaded and fits into a shaped hole in the steering knuckle. The front ball joints make the front wheels and suspension to move back and forth and also up and down if the steering wheel is turned and if you are driving on the road.
Things You Need:
- Jack
- Jack stands
- Pry bar
- Wire
- Metal cleaner (WD-40 or PB Blaster)
- Tool chest
- Safety gear (gloves, eye protection, overalls)
- Hammer
- Pickle fork or tie rod separator
- Gasket
- Torch (if needed)
Steps in Removing the Ball Joint
Before you work on your car’s ball joint you need to put on your safety gears first and prepare your working area. Your car should be parked on a flat surface. Don’t forget to block the wheels both the front and back.
Using the jack lift the front wheels and place the jack stands to support the vehicle. To make sure nothing will move anywhere as you work on the ball joint, block the back tires. Now you are set, you can start working on the ball joints
Step #1 Check the ball joints
Inspect the ball joints and check if you have a strut-style suspension or a control arm. Check the ball joint by jacking up the car and use a pry-bar to assess wheel play in a strut-style suspension. You can also check the ball point by jacking up the control arm close to the ball joint to check for wheel play.
Note: A space between the ball joint and the point of contact indicates that you need to replace it. Also if the wheel moves considerably, it is a sign of worn-out ball joint.
Step #2 Remove the Wheel to Expose the Ball Joint
If needed, you also have to move aside the brakes. To move it, use a wire to hang the brakes and do not dangle them by the brake lines. Loosen the frames that hold the sway bar or control arm in a position to have a better space when moving the suspension components away.
If you can, try to work on the brake rotor, caliper, and the line without moving the assembly. If it’s possible, then you will have to bleed the brakes.
Note: Since the ball joints are one of the dirtiest components of your car, we suggest that you soak all the bolts removed with metal cleaner (WD-40 or PB Blaster). By doing this you can remove the dirt accumulated on them and it is much easier to work on them.
Step #3 Pull the Cotter Pin and Loosen the Castellated Nut
The top portion should look like a crown or castle at the bottom. You don’t have to remove the castellated nut, just loosen it and keep it in a safe position.
Note: if you are working on a McPherson strut suspension, you have to remove the pinch bolt that holds the ball joint stud.
Step #4 Pop the Ball Joint Out
You are trying to guide it through the hole in the upper half of the steering knuckle. It is not that easy because it is fitted very tightly so it can hold the ball joint in position. Another factor that makes it hard to loosen it is the road dirt accumulated around the suspension. You need a special tool known as pickle fork or tie rod separator and a hammer to help in maneuvering it.
Using the wrench, remove the biggest nut from the joint, place a new nut, and then place the pickle fork between the steering knuckle and the control arm. You might need to hammer it and do not be hesitant to whack it. You might damage the gasket around the ball joint, keep a spare near you, you might need to replace it.
Note: If you place the castle nut on before you whack it with a hammer, you prevent the ball joint from popping out completely and dropping on the floor, or more likely hit your foot.
Step #5 Take the Allen Bolts Out and Slide Free the Control Arm
Loosen the Allen bolts or drill the rivets out that holds the ball joint in position and slide the ball joint out. There are instances you need to heat the corroded parts with a torch to loosen them. You need to be very cautious when using a torch.
Now that you have completed the process of removing the ball joint, your next step is to replace the worn-out ball joint. Follow the guide carefully on replacing the ball joint.
Watch the video here https://www.youtube.com/watch?v=Yiwboy-A-0s
Final Words
Some ball joints are lubricated for life and thus you don’t have to grease it regularly. The fact is that it does not live very long. A worn ball joint may cause clunks and sloppy steering. Your safety on the road is important. Once you notice there is problem with your ball joint, you need to inspect it right away and replace it if needed.
Keep in mind some parts of your car are sharp and pointed. You should wear durable working gloves to protect your hands from accidental cuts. Also, since you are working underneath your car, you need to protect your eyes from falling objects and dirt. Safety when working on any parts of your car is important. Hope our how to remove a ball joint without press guide helps you with your ball joint issues.
************************
Bio Author:
Hi there!
My name is Tracy and I’m your guide in the amazing world of cars. With over 10 years of experience in the car dealership industry, I am well prepared when it comes to writing about car models, car components, safety tips, vehicle fun facts and tips on selling or buying vehicles.
I invite you to dive with me in this beautiful world of cars and discover the latest news and trends about your favourite model of vehicle. Stay up to date with the changes in this industry and learn how to buy the right car components for you.


